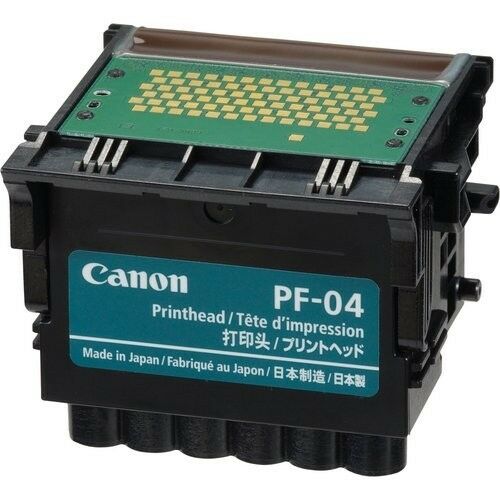
For Canon Printhead QY6-0086 Print Head MX922 925 725 MX722 IX6880 MX727
Rated 5 out of 5 based on 5 customer ratings
$20.58
431
Refund will be given as:Money back or replacement (buyer's choice) Item must be returned within:30 Days Type:Printhead Condition:New Compatible Brand:For Canon All returns accepted:Returns Accepted Restocking Fee:No Return shipping will be paid by:Seller Brand:Unbranded
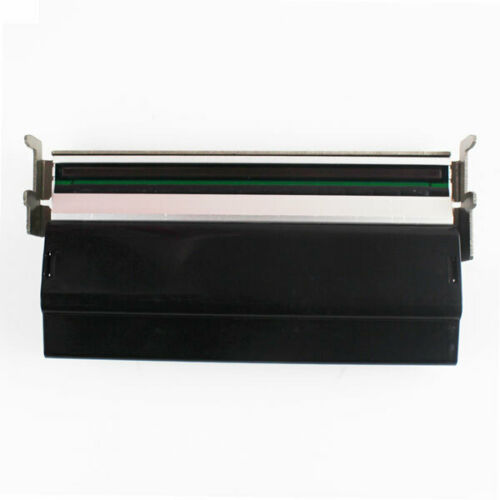
Description: Name: Print Head QY6-0086 Printhead for MX920 MX922 MX924 MX925 MX928 MX728 IX6780 IX6880 Type: Print Heads Compatible Brand: For Canon Compatible Model: Canon iX6840,iX6850 Serie,Pixma MX720, MX721, MX722, MX725,Pixma MX920, MX922, MX924, MX925, MX926, MX927 Quantity: 1Pcs Print Head Note: Only black Printed Please Note: The product is not original. It has been tested before delivery and is in good condition. If the printhead does not work after installing, the main board may be burn out the printhead during the installation of the product, which is not a quality problem. Installation Notes: 1. Make sure the power is on. 2. Lift the scan assembly until it locks in place (1). The print head bracket moves to the middle. 3. Open the output tray (2). 4. Open the inner cover. Caution: A. do not attempt to move or block the print head bracket manually. b. Do not touch any metal parts. c. Do not touch transparencies (a), film connector (b), ink collector (sponge part) (c) or any metal parts. 5. Lift the fixing rod and take out the print head. The print head can be removed with the ink cartridge. 6. Then put the print head back in place and press down the fixing rod. 7. Close the inner cover. Caution: press the middle of the inner cover until it locks into place. 8. Return the scan assembly to its original position. The LCD displays a message asking if the ink cartridge has been replaced. 9. Press the [right arrow] and select [no] to exit. 10. Put letter or A4 size plain paper in the automatic paper feeder. 11. Press [copy] or [Photo]. 12. Press [menu] repeatedly until [user data] appears. 13. Select [maintenance] using [left arrow] or [right arrow]. 14. Press . 15. Use [left arrow] or [right arrow] to select [align head]. 16. Press . This machine prints the print head position pattern. 17. Starting from column a of the printout, mark the tick mark in the pattern closest to the image. (A) Column a (b): poor example (least compact box) (c): good example (most compact box) 18. Use [left arrow] or [right arrow] to select the number of the pattern in column a of the printout in step 17. (A) : column: select the number of the pattern closest to the image. 19. Press . Repeat steps 18 and 19 for columns B through K. On Oct-12-20 at 16:37:08 PDT, seller added the following information: